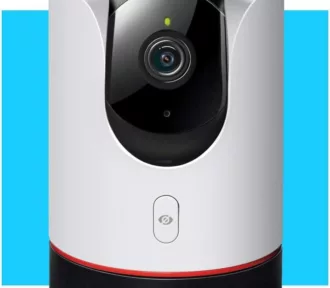
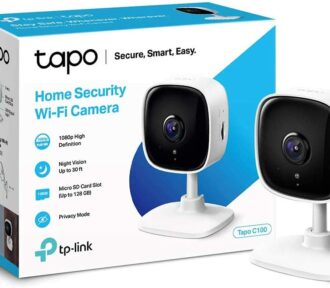
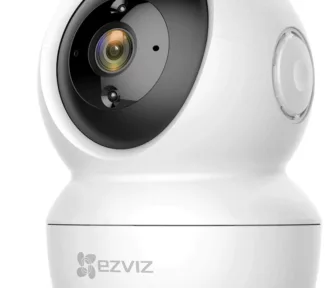
The TP-Link TAPO C100 surveillance camera is a smart device that allows you to monitor your home from your smartphone or tablet. With it, you can view real-time footage, record videos, receive motion alerts, communicate with your family or pets, and much more. In this article, we will explain step by step how to install and configure the TP-Link TAPO C100 surveillance camera.
What you need to install the camera
Before you start, make sure you have the following:
- A 2.4 GHz Wi-Fi network with internet access.
- A smartphone or tablet running iOS 9.0 or higher, or Android 4.4 or higher.
- The free Tapo app, which you can download from the Apple App Store or Google Play Store, or by scanning the QR code that comes in the camera box.
- A microSD card (optional) to store recordings locally. The camera supports cards up to 128 GB.
How to connect the camera to the Wi-Fi network
Once you have everything you need, follow these steps to connect your camera to your Wi-Fi network:
- Plug the camera into a power outlet and wait about 30 seconds until the LED flashes red and green. This indicates that the camera is ready to be set up.
- Open the Tapo app and log in with your TP-Link ID. If you do not have an account, you can easily create one by following the instructions in the app.
- Tap the + button in the app and select Smart Camera C100.
- If you are using an iOS device, go to the Wi-Fi settings on your phone or tablet and join your camera’s network: Tapo_Cam_XXXX. Then return to the Tapo app. If you are using an Android device, you do not need to do this step, as the app will automatically connect to your camera’s network.
- The app will start searching for your camera. This may take a minute or two.
- After finding the camera, connect it to your home Wi-Fi network and enter the password.
- The app will begin pairing your camera with the Wi-Fi network. Make sure the LED stays on during pairing.
- When pairing is complete, assign your camera a unique name and set a location for easy identification. You can also create a password to protect access to your camera from other devices.
- Tap Next to complete the setup.
- The “Completed” page means the camera was successfully added and you can tap Done to start using your camera.
How to set up the camera functions
After connecting the camera to the Wi-Fi network, you can access its functions from the Tapo app. Some of the most important features are:
- Live View: Allows you to see what is happening in your home in real time from your smartphone or tablet. You can adjust the video quality, turn the sound on or off, take screenshots, record videos manually, talk to people or animals in front of the camera and rotate the image 180 degrees if you have installed the camera upside down.
- Motion detection: Allows you to receive alerts on your smartphone or tablet when the camera detects motion in the area you have defined. You can adjust the detection sensitivity, the activation time and the type of notification you want to receive.
- Private mode: Allows you to temporarily disable the camera to protect your privacy. When private mode is activated, the camera will stop recording and transmitting video and audio, and you will not be able to access the live view from the app.
- Scheduling: Allows you to set custom schedules for the camera to turn on or off automatically according to your preferences. For example, you can schedule the camera to turn on only when you are away from home or at night.
- Recording: Allows you to view the recordings the camera has made based on motion detection. You can filter recordings by date and time, play, download or delete them from the app. The recordings are stored on the microSD card inserted in the camera, or in the cloud storage service if you have signed up for it.
How to physically install the camera
After configuring the camera’s features from the app, you can physically install the camera wherever you want. The camera comes with an adjustable mount that allows you to place it on a flat surface or attach it to a wall or ceiling. To physically install the camera, follow these steps:
- Choose a suitable place to install the camera, taking into account the viewing angle, lighting and distance to the Wi-Fi router. Avoid placing the camera near sources of heat, moisture or electromagnetic interference.
- If you are placing the camera on a flat surface, simply adjust the bracket to orient the camera as desired. If you are attaching the camera to a wall or ceiling, mark the points where you will drill holes using the bracket as a template. Then drill the holes and insert the plastic plugs that came with the camera. Finally screw the bracket to the wall or ceiling and adjust the angle of the camera.
- Plug the camera’s power cable into a nearby power socket and check that the LED lights green. This indicates that the camera is connected to the Wi-Fi network and ready for operation.
How to access more resources about the camera
If you want to know more about the TP-Link TAPO C100 surveillance camera, you can consult the following resources:
- The user manual that comes with the camera or that you can download from the TP-Link website.
- The setup video that you can watch from the Tapo app or from TP-Link’s YouTube channel.
- The download centre where you can find the latest firmware and software updates for your camera.
- The support centre where you can find FAQs, guides and solutions to common issues with your camera.
- The full review of the TP-Link TAPO C100 that we have done on our blog, where we tell you about its features, advantages and disadvantages.
- The article on how to choose the best security camera for your home that we have published on our website, where we give you tips and recommendations for choosing the most suitable model for your needs.
We hope this article has been useful for you to install and configure your TP-Link TAPO C100 surveillance camera. If you have any questions or suggestions, please do not hesitate to leave a comment.


